Showing posts with label wicking bed. Show all posts

Sunday, 25 September 2011

Hot Tub Wicking Bed


After renting the concrete saw for the THIRD time (pity our neighbours!) we finally unearthed all of the blocks from the 4th bed. There was no better sound than the last block being lifted out!

Here is the 4th bed dug out:

After lining the bed with the bed with pond liner, I tried to convince Tim to fill the bed with water and make it into a hot tub instead of a garden bed. At 14' long and wide enough for 2 people, I thought it was a great idea.
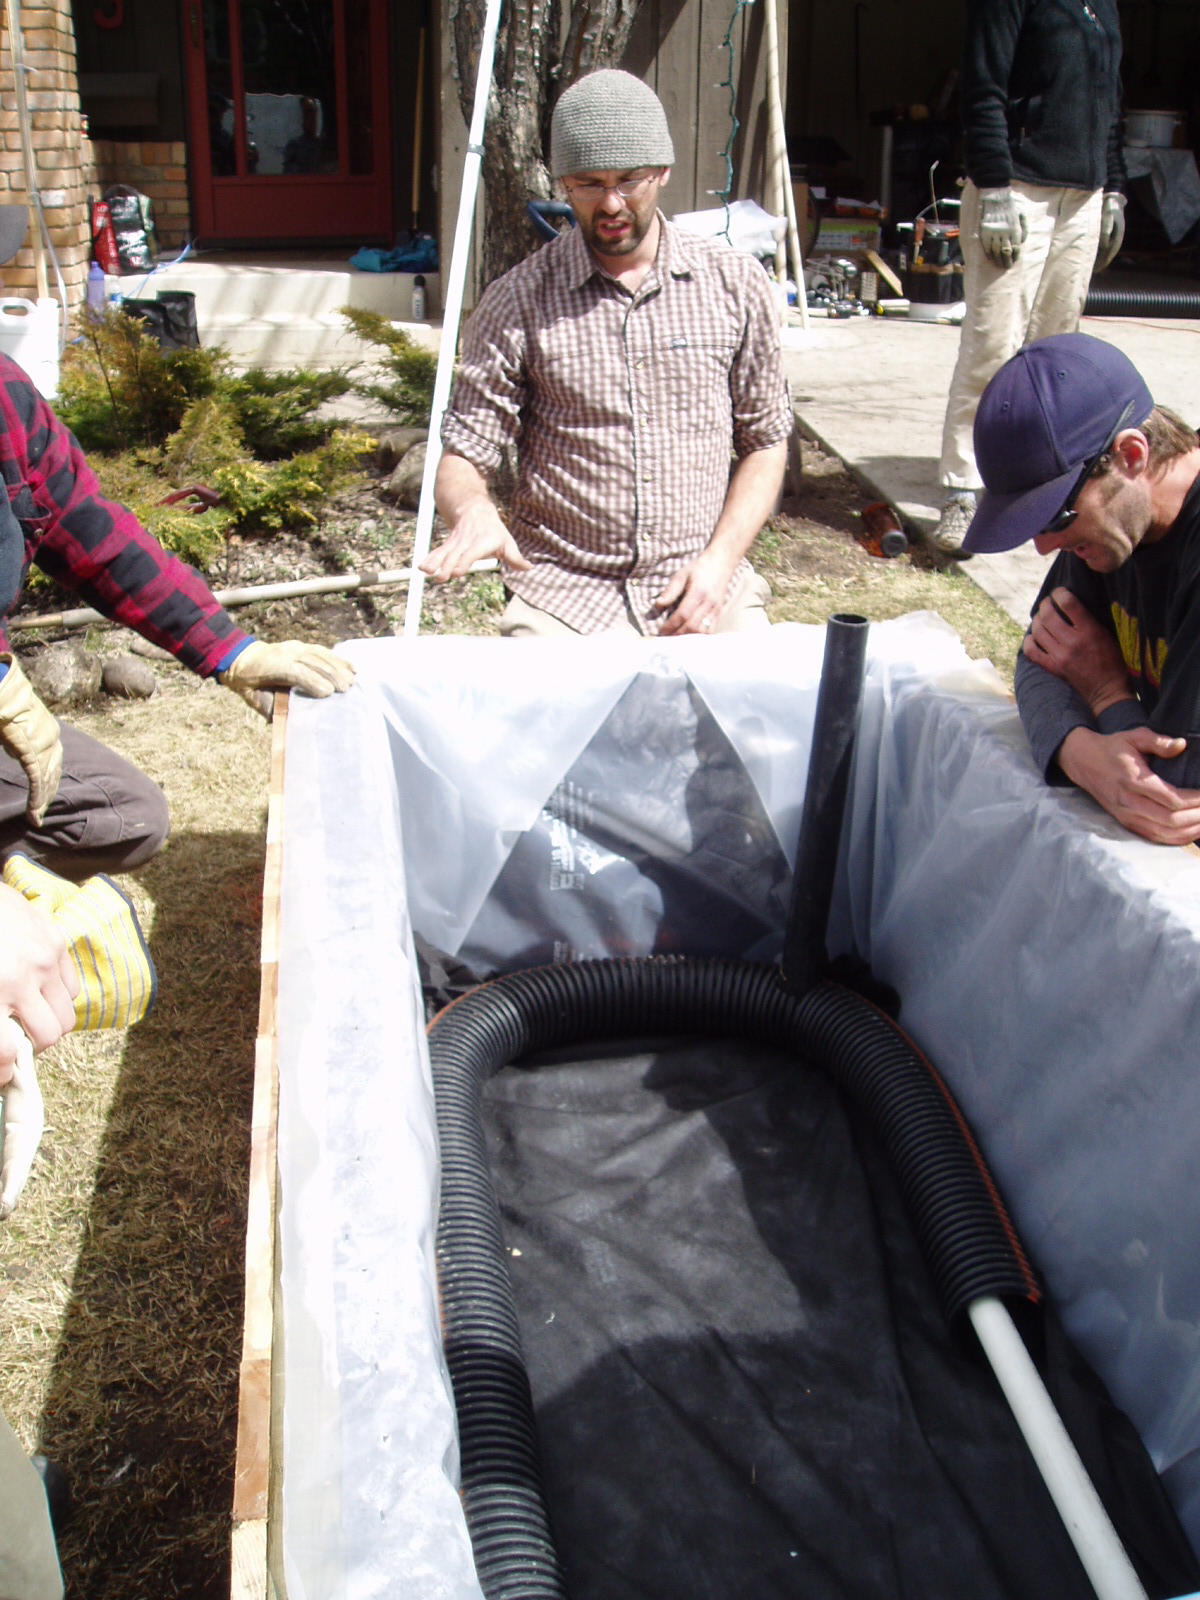
Tim won this debate, and we began finishing the bed. Here is the weeping tile being laid:
A total of 200' of weeping tile was used in the 4 beds and garden swales. Next we added chunks of concrete, larger rocks and rock debris from a neighbours pile in the alley to hold the tile in place and to create the overflow area seen towards the bottom of the pic (above).

After weeping tile came the landscape fabric and 1 cubic meter of soil.

After MANY, MANY months of work, our four beds are done!!!
Summer garden update pics are to follow soon!

Monday, 12 September 2011

Bed 3 of 4


Here it was June 12th, 2011 and we were still working on these wicking beds just waiting to plant our seedlings. Many choice words were exchanged about these beds, but we did get some great muscles from all the digging, prying, and shoveling! We made sure to take some time out to have some fun too.

We did not do a great job of documenting the first two wicking beds, but remembered to by the 3rd bed and got even better on bed 4. Here is the story of bed 3... Many of the pieces of 3rd and 4th bed were not cut all the way through which meant a great upper body workout. While chipping out the concrete pieces, we needed to protect our window and patio door from flying pieces. (If you are a neighbour, now you know why we had hanging plastic for a few days!)

After all of the pieces were freed, the bed was dug out, and the gravel sifted, We lined the bed with pond liner, put in weeping tile and rocks to fill the bottom. Here you can see the pipe that we used to add water to the bed:
Laying landscape fabric over the weeping tile.
After soil was added and our seedlings were finally planted, we tested out the overflow area. This picture shows the water draining out of bed 3 into the swale that is connected with main garden. Works great!
Here is the with 3 of 4 beds complete!

Now we were seriously considering if we should finish bed 4 or just leave it alone...

Monday, 5 September 2011

Finally the wicking bed construction!

This is the moment you have all been waiting for...how we built the wicking beds out of concrete!

Step #1: Offer to provide drinks and food to a great friend with strong arms, good endurance, and a great analytical mind in exchange for their help. Meet Pam!
When we were not digging, sifting, and hauling soil, we talked about those things and planned out the wicking beds. Here are Tim and Pam marking out the pond liner to line the 4 beds with:
We did not document the first 2 beds very well, but here you can see the pond liner, rocks and weeping tile filled with water. Because none of us thought ahead to how we could connect the 2 beds, we had to improvise a bit. I am digging the drainage swale at the end of the beds that connects with the garden.
Collectively, we decided that it would be best to not connect the 2 beds if we wanted to grow food in the beds this year. The growing season here is 100 days if we are lucky, so no more delays could happen! Here is what we came up with for drainage:
We wrapped a cinder block in landscape fabric to allow water to drain out of the first bed into the gravel drainage area between the 2 beds. If the overflow water gets too high, it will go over top of the vertical concrete piece that separates the gravel and garden swale. FYI: none of us are engineers, so this is our best guess at what will happen. Either way, the excess water will infiltrate back into the ground and not be lost to evaporation.

After lining the beds with landscape fabric and adding the beautiful soil--our first two beds were planted on June 12!

Only 2 more beds to go! Time for a food break first though :) (Refer to step #1)

Monday, 29 August 2011

Using what you have


My original thought to use wood mulch (instead of gravel) in the swales on top of the weeping tile was changed quickly after we pried up the concrete and it revealed that we had 8" of gravel and sand under the RV pad. We did not want to use the sand-gravel mixture as is because the sand would settle in the air spaces, so I built a sifter with 1/2" screen and lumber that was already in the garage. The larger rocks were saved for our planned herb spiral, sand was sifted into a cubic meter bag that we saved from the landfill, and the gravel was put directly in the swales.

Here is the sifted gravel on top of the weeping tile. Looks good to us! And even better, we saved a ton of money by not hauling in gravel. Sifting gravel from 2 of the 4 beds yielded enough gravel to fill over half of the swales.
When your wicking beds start to look like graves, it is time to stop digging!

The pathway to the patio door until June 4th was a few old boards that were saved from the deck. Since our beds were planned out and we determined that we had enough pieces to spare, we built a walkway. Locating all of larger pieces that were not marked for another purpose, we began moving the pieces into place. But there was something wrong about the path. It needed a really big piece... which we pulled out to the back alley last fall. Though we were getting some good muscles with the concrete moving, we were just not quite strong enough to move the piece by ourselves. Here is where "building community" comes into play! We asked our generous (and very strong) neighbour and his brother to help us move just one piece. In 6 minutes, they picked up the piece and put it in place. Thanks Chris and Anthony!

Using the sifted sand for a leveling surface, the pieces fit in place like a puzzle.

Tuesday, 23 August 2011

Wicking Beds

Over the winter our ideas about what to do with the concrete evolved from "get rid of it" to "keep it to make in-ground wicking beds". I first learned about wicking beds in my PDC course and got hands-on experience with it during a permablitz in April 2011.

The basic idea of a wicking bed is that there is a large reservoir of water in the bottom of the bed where water is wicked up through landscape fabric into the soil for the plants to use. This method reduces the need for daily watering and encourages plants to develop a healthy, deep root system. See more info on my other blog Apple Tree Sustainables.


Here Rob Avis is demonstrating how to connect the bulk head fitting

The plastic (or rubber) layer ensures that water stays contained in the wicking bed, the weeping tile aids in water distribution throughout the bed, and the black stand pipe is where the homeowners will input water.
Here is the finished product of 5 level above ground cedar wicking beds.

This experience gave us more to think about in terms of how to best use our concrete as a heat sink and minimize garden watering. Another piece to the puzzle is found!