Monday 29 August 2011

Using what you have


My original thought to use wood mulch (instead of gravel) in the swales on top of the weeping tile was changed quickly after we pried up the concrete and it revealed that we had 8" of gravel and sand under the RV pad. We did not want to use the sand-gravel mixture as is because the sand would settle in the air spaces, so I built a sifter with 1/2" screen and lumber that was already in the garage. The larger rocks were saved for our planned herb spiral, sand was sifted into a cubic meter bag that we saved from the landfill, and the gravel was put directly in the swales.

Here is the sifted gravel on top of the weeping tile. Looks good to us! And even better, we saved a ton of money by not hauling in gravel. Sifting gravel from 2 of the 4 beds yielded enough gravel to fill over half of the swales.
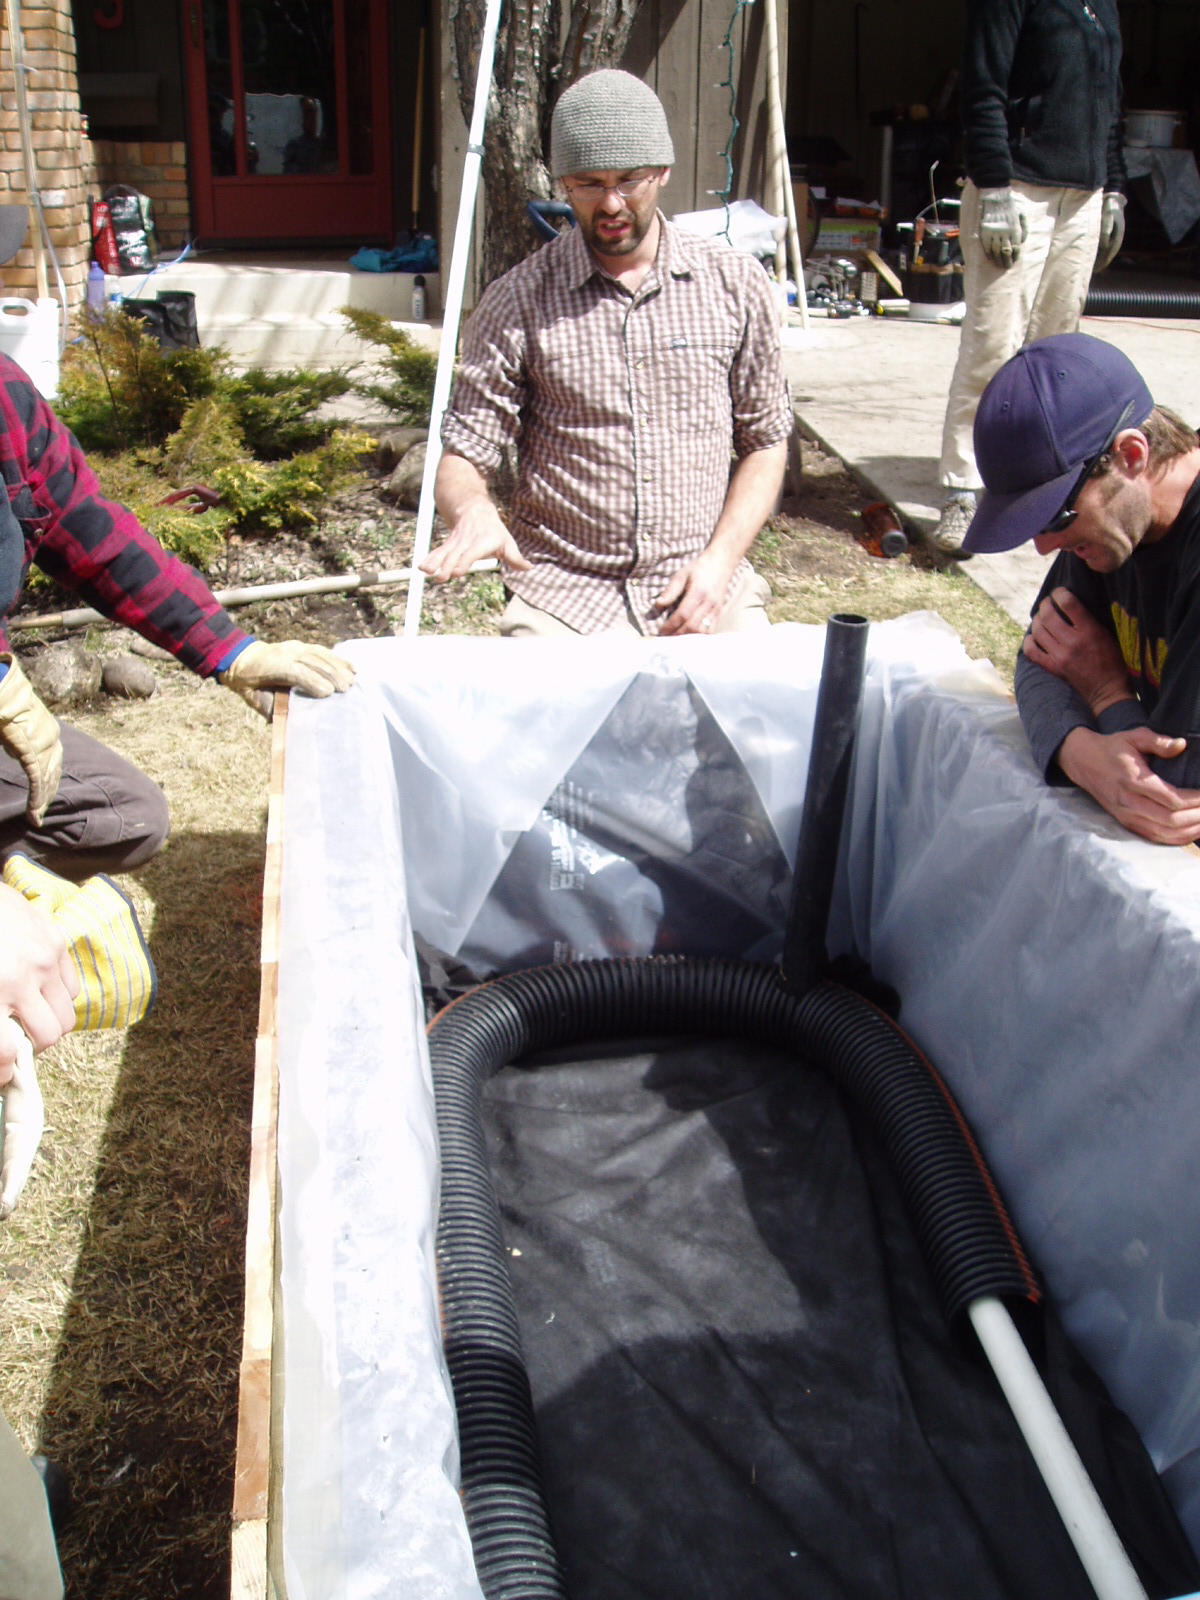
When your wicking beds start to look like graves, it is time to stop digging!

The pathway to the patio door until June 4th was a few old boards that were saved from the deck. Since our beds were planned out and we determined that we had enough pieces to spare, we built a walkway. Locating all of larger pieces that were not marked for another purpose, we began moving the pieces into place. But there was something wrong about the path. It needed a really big piece... which we pulled out to the back alley last fall. Though we were getting some good muscles with the concrete moving, we were just not quite strong enough to move the piece by ourselves. Here is where "building community" comes into play! We asked our generous (and very strong) neighbour and his brother to help us move just one piece. In 6 minutes, they picked up the piece and put it in place. Thanks Chris and Anthony!

Using the sifted sand for a leveling surface, the pieces fit in place like a puzzle.

Concrete Cutting #2 & 3


Since our first intention was to cut the concrete and get rid of it, we cut it in 1-2' square pieces. Then permaculture entered our plans and everything changed. We rented the concrete saw for another day and got most of the cutting done before the saw broke and we had to take it back. Turned out that Home Depot forgot to put on the bolts to hold on the safety guard, they were surprised that it ran for 4 hours. They quickly told me that the rental would be no cost since it was their fault. I am sure I heard the neighbours sigh when they knew we would have to rent the saw for a 3rd time 2 weeks later!

Next came the fun part--moving the concrete, digging the beds, and swales! Here is the vision we had laid out in boards and fencing:


While Tim was prying up the concrete, I dug swales in the garden. Following a similar rainbow pattern to last year, we added made sure to add in keyholes so that there would be no need to walk on the soil and cause compaction.


Here you can see the two beds closest to the garden are laid out and Tim is working on the 3rd bed.


After digging the swales, keyholes, and approximately leveling them, I began laying in the weeping tile covered with fabric into the swales. By the time I finished all of the swales, Tim was just about finished moving the concrete from one of the beds.


While we were prying and digging, our plants were yelling out words of encouragement so that they could get in the ground before summer started.

Now what to fill our swales with? We planned to use wood mulch for adding carbon to the soil and we figured that it was easier to dig out than rock if we changed our mind on using swales. As usual, our plans changed due to our concrete situation!

Tuesday 23 August 2011

How to move up to 400 pound slabs of concrete


After cutting the concrete in the fall, Tim and I tried to remove some of the larger pieces by dragging them with ropes. A few pieces into the move, the straps broke due to friction so we had to figure out a better plan. I bought some chains to try and drag the pieces, but was still not satisfied with that idea.

Maybe a winch? Cables? No, there must be something better. Princess Auto to the rescue! Chatting with one of the sales clerks about my idea to move the concrete pieces, he immediately thought of an idea. He said " you are going to laugh when I show you what will work the best because they look like straightened out coat hangers, but they can lift 100 pounds each!" I told him that I would try anything to make the job easier, especially if it was cheep. They are called Concrete Slab Setters and boy did they work GREAT!

Since we were now able to move the pieces quite easily we decided to save the $1500 that contractors quoted me on to pour 2 stairs out of our patio door and try to make them ourselves. Here is what we started with:

The largest of the pieces that we had to work with:
The Concrete Setter worked like a charm! The difference in using the Setters over lifting the pieces is that we only needed to lift the pieces enough to clear our toes and the ground instead of 2 feet to be able to walk with them.

First layer done with a mixture of sand an small gravel to help level the second layer.

Layer 2 done!
Top layer done until we can cut one more piece free when we rent the concrete saw again.
The reason that one side looks lopsided is that there was a concrete pillar from the deck and our shed is quite close on that side as well. We may fix them during the fall when we make some other changes to that area. Five hours of work and sore muscles was certainly worth saving $1500!
Now, what to do with the rest of the RV pad??


Wicking Beds

Over the winter our ideas about what to do with the concrete evolved from "get rid of it" to "keep it to make in-ground wicking beds". I first learned about wicking beds in my PDC course and got hands-on experience with it during a permablitz in April 2011.

The basic idea of a wicking bed is that there is a large reservoir of water in the bottom of the bed where water is wicked up through landscape fabric into the soil for the plants to use. This method reduces the need for daily watering and encourages plants to develop a healthy, deep root system. See more info on my other blog Apple Tree Sustainables.


Here Rob Avis is demonstrating how to connect the bulk head fitting

The plastic (or rubber) layer ensures that water stays contained in the wicking bed, the weeping tile aids in water distribution throughout the bed, and the black stand pipe is where the homeowners will input water.
Here is the finished product of 5 level above ground cedar wicking beds.

This experience gave us more to think about in terms of how to best use our concrete as a heat sink and minimize garden watering. Another piece to the puzzle is found!

Sunday 21 August 2011

Rotating & pallet compost bins


Over the past year we found out that the standard black compost units sold by the city were challenging to keep wet enough and turn correctly. The first solution that I came across was a rotating compost bin, taking the displeasure out of trying to turn the compost. I bought the 50 gallon plastic drum for $20, while all of the rest of the materials were repurposed from our deck for my friend Mark. Since my friend Mark, owner of Worms @ Work, and I built the rotating bin I have added 5 handles on the outside of the drum to assist in turning more easily and 1/2" holes to assist in draining and aeration.

For ease of use and to keep feedback in the system we placed the new composter near our patio door. So far so good!

The other system that we added is the 4 pallet compost bin. In my Permaculture Design Certificate (PDC) course, we learned that an optimal size for a compost bin is 1 meter squared which is conveniently the same size as most pallets. Using some repurposed rebar hammered in the ground to hold the pallets vertical, the system placed in the back alley was ready to go within 20 minutes. As we were building the system, our neighbour who likes to be around when work is being done, happened to be trimming his trees before he came over to check out what we were doing. I asked if we could use the trash bin full of green material for starting the pile (to rescue it from the landfill), he gladly agreed. Since then, we have saved 2 bags of grass clippings and other branches from the landfill. The pallet composter has proved far superior to the black compost bin from the city.

Friday 5 August 2011

Permaculture Enters the Master Plan


Up until now our plan was to get rid of the concrete after cutting to make it easier for people to haul away. I had a new add posted on Kijiji for free cut concrete blocks to use for pathways or truck weights for winter. There were a few responses, though only one person came to get a few pieces to use for a shed base. One respondent and I were in contact for months about coming to get the pieces when the next Chinook came. Since there were few of those warming events this past winter, it was nearly March before it was possible to get the pieces out.

In the mean time, I became much more interested in permaculture and began taking classes with Verge Permaculture (see previous post about chop & drop) to earn a Permaculture Design Certificate (PDC). Since living in Oregon 3 years ago, where we became passionate about organic gardening, preserving food during peak seasons through canning and dehydrating, we have been wanting to do more on our property to assist our sustainability. Permaculture fit that desire... and lots more. It was truly a life changing course. Every other weekend from March through May (to fulfill the 72 hour requirement), I came home with my head swimming with ideas on how we could improve our property and life. Some ideas like installing a food forest (a combination of trees, shrubs, herbs, vines, and ground cover that all benefit each other) Tim was really excited about, whereas a composting toilet he was not so keen on.

As I talked with some of the permaculture experts in town and showed them pictures of our concrete jungle, they all said the same thing: "you have to keep that concrete!" I'm sorry, did you say "keep"?? We have been trying to get rid of it for months! Yes, it is true that our backyard gets several degrees warmer than any other lot around due to the concrete and our laundry dries within 1 hour of being hung out on a warm day.

"And just what do you propose I do with all of this cut concrete?" I would ask them. They had a variety of ideas, but the most practical one I remember was to make raised beds out of the pieces. As the PDC course continued, I drew new sketches of ideas for the backyard each weekend. None of the designs really stuck, it seemed that hands on was the only way to test our ideas. Concrete, as you may imagine, is not very forgiving!

Keeping in mind that our number one objective was to increase our food growing space, we kept thinking about what to do with the concrete for a few months.